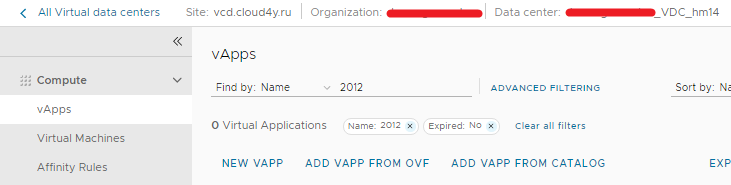
Go to the vAPPS tab, select add vapp from catalog.
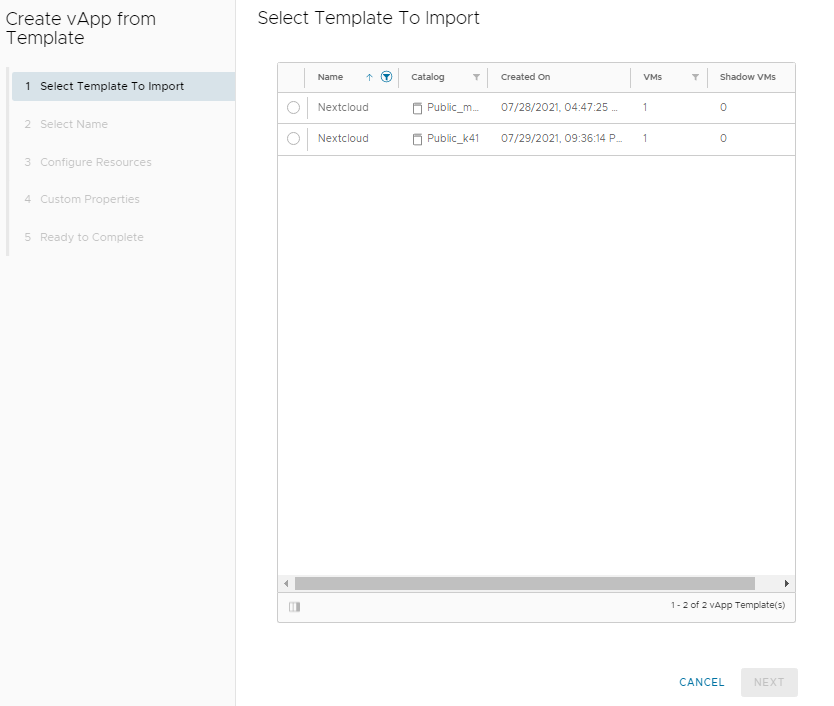
Then select the template in accordance with the name of the data center where your vDC is located.
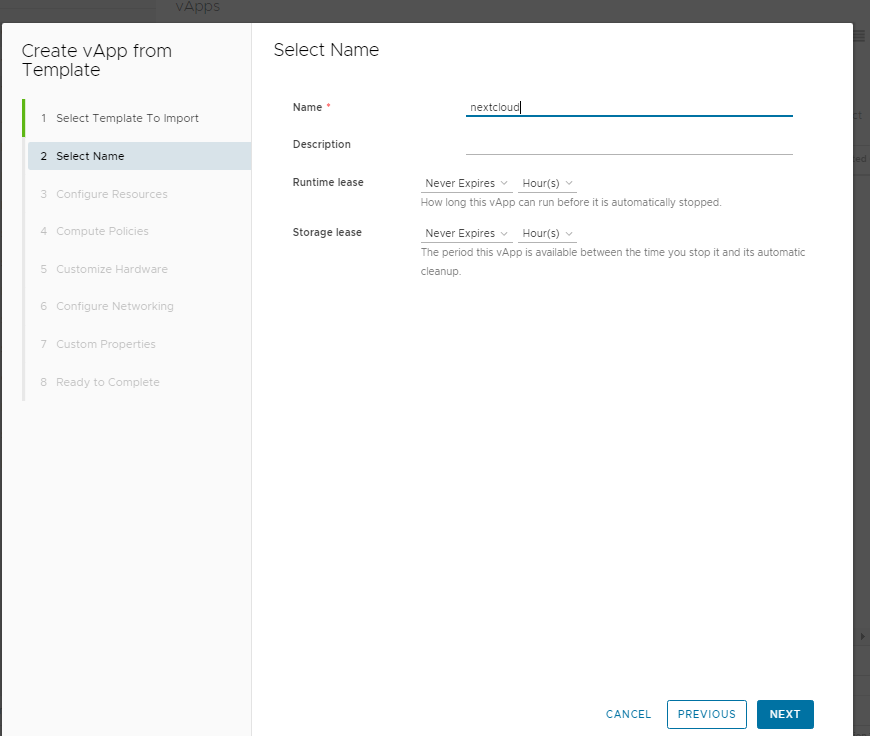
Enter the name of the virtual machine for Nextcloud.
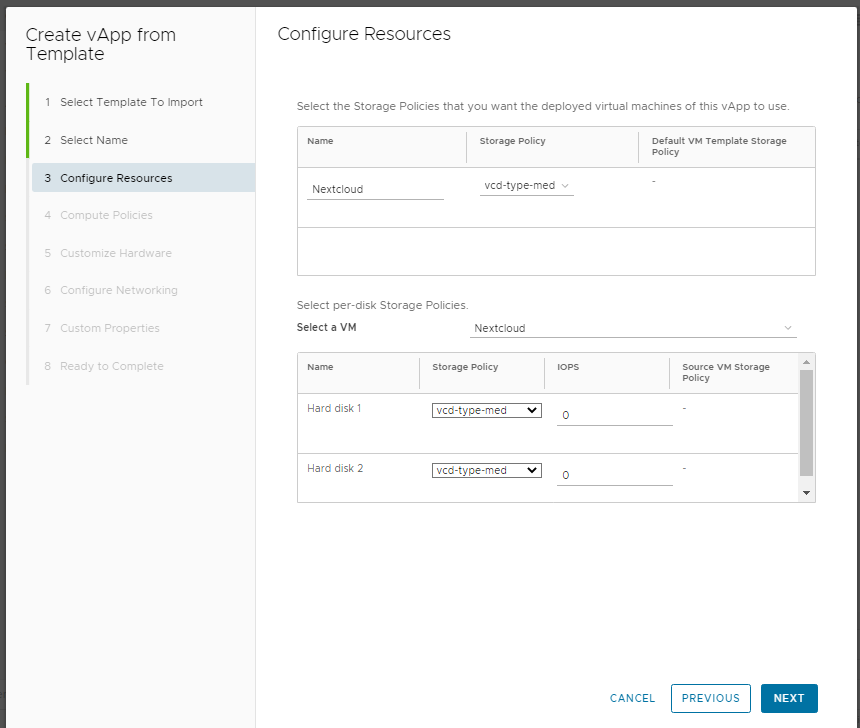
Select the virtual machine's storage policy.
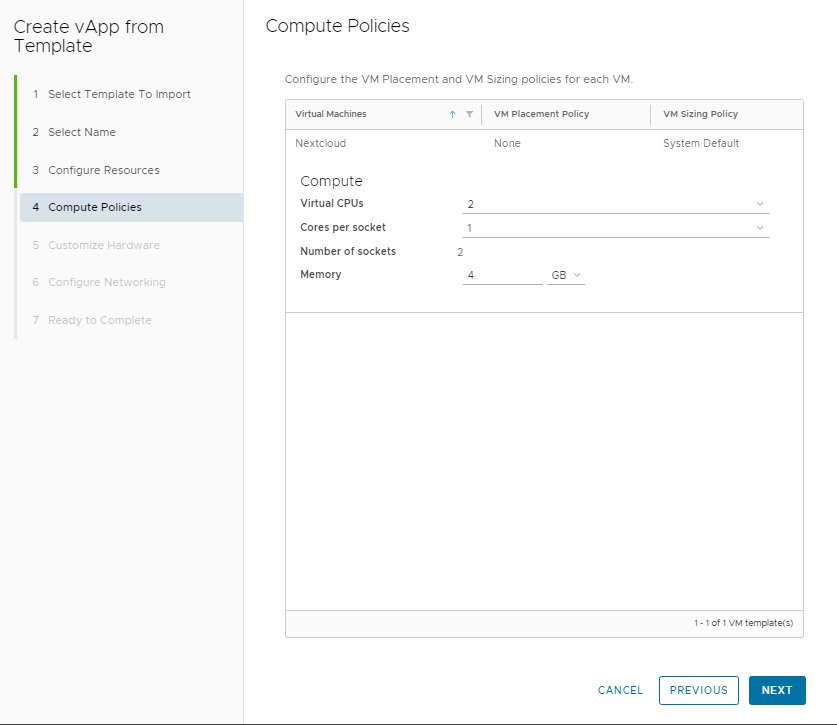
Select the amount of resources allocated to the virtual machine.
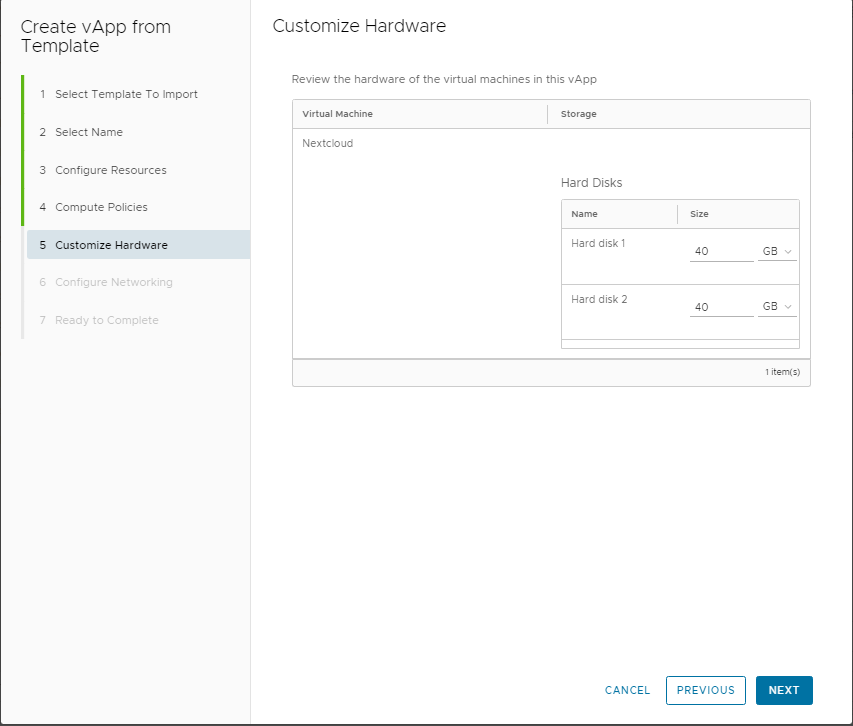
Specify the size of the virtual hard drives.
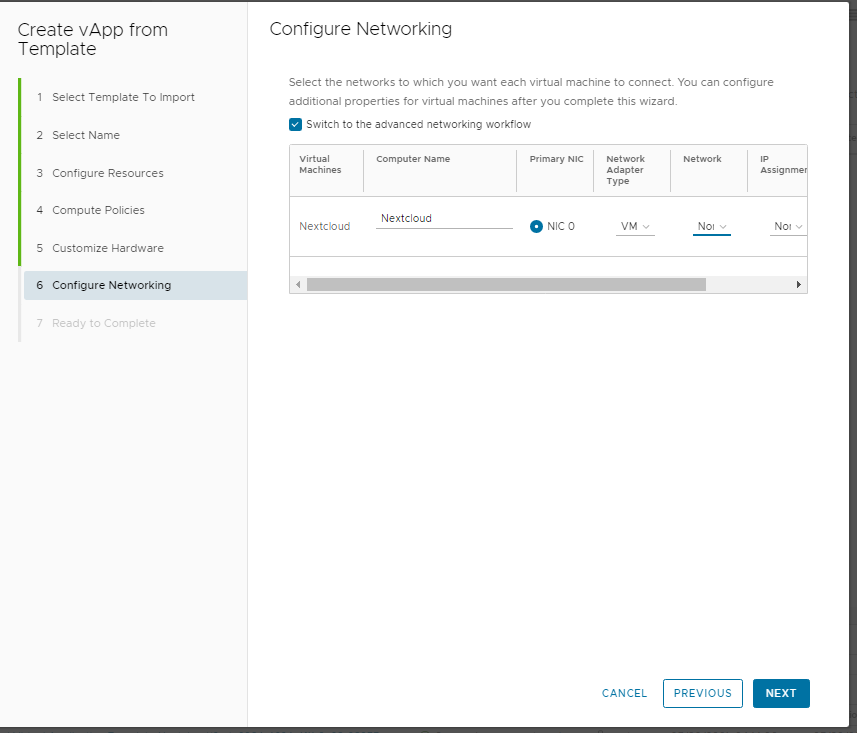
When configuring the network, select "Switch to advanced networking workflow" and configure the network adapter of the virtual machine:
- Network adapter type - vmxnet3
- Network - internal network of the vDC
- IP assignment mode - static ip pool
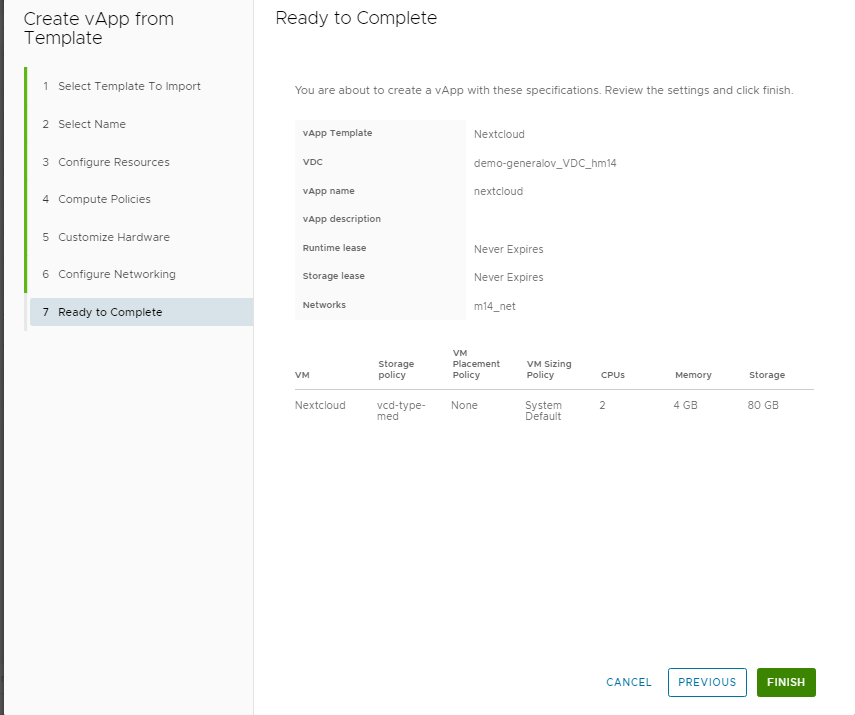
Press Finish to start the deployment of the template.
After successful deplugging of the pattern press START
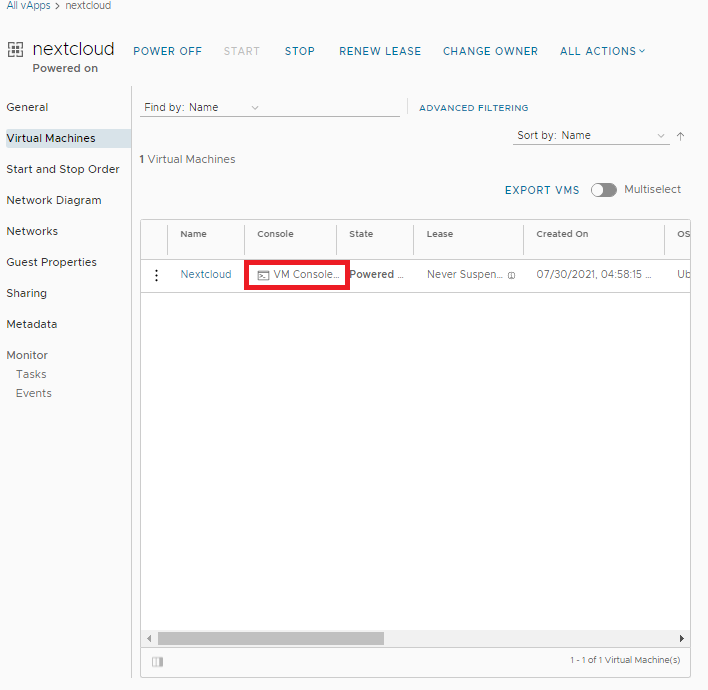
Open the VM console.
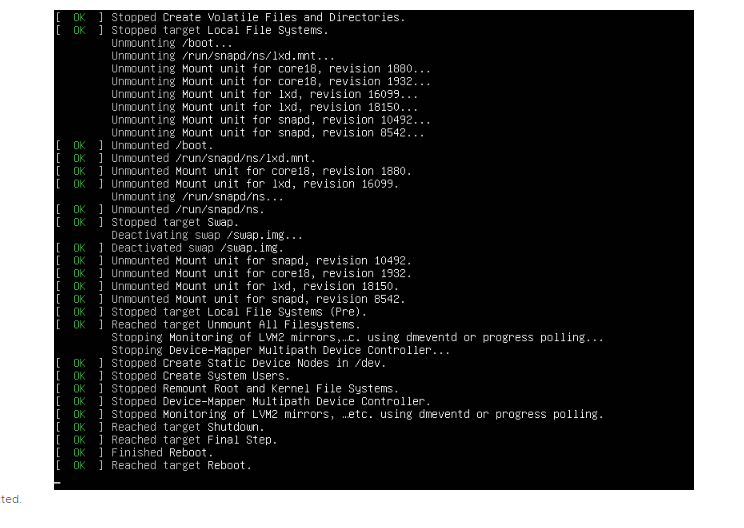
Wait for the end of the scripts to prepare the VM for the first startup.
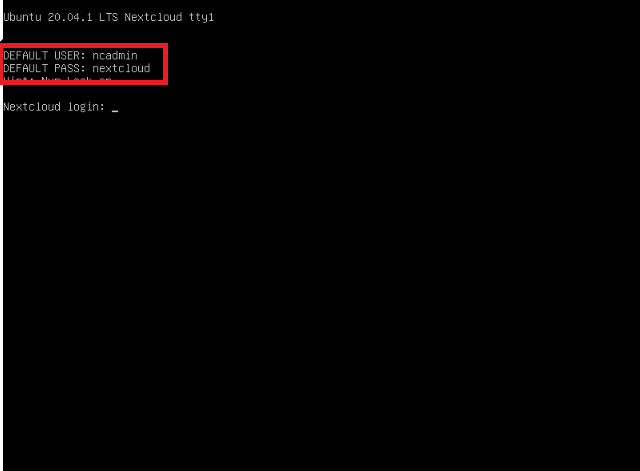
Authorize with the credentials specified on the VM screen.
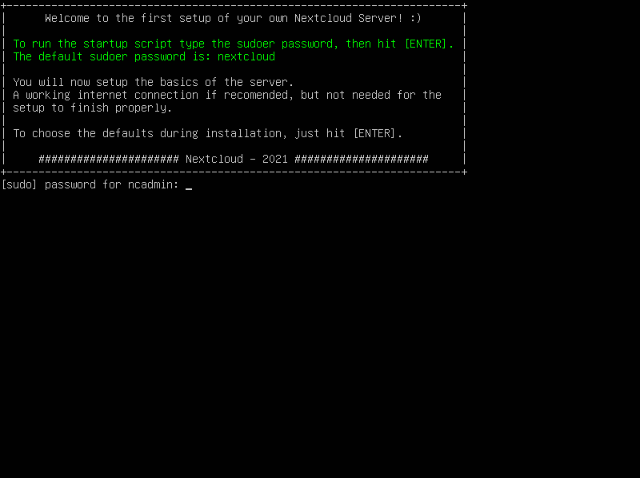
Confirm script start with previously entered password from ncadmin user
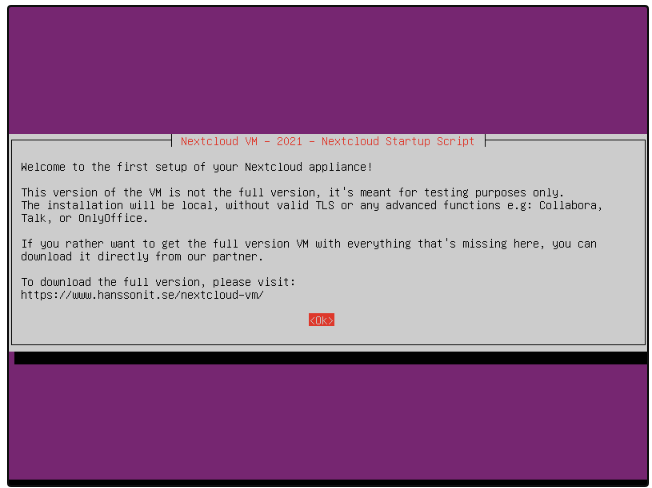
The initial configuration script for the VM is started.
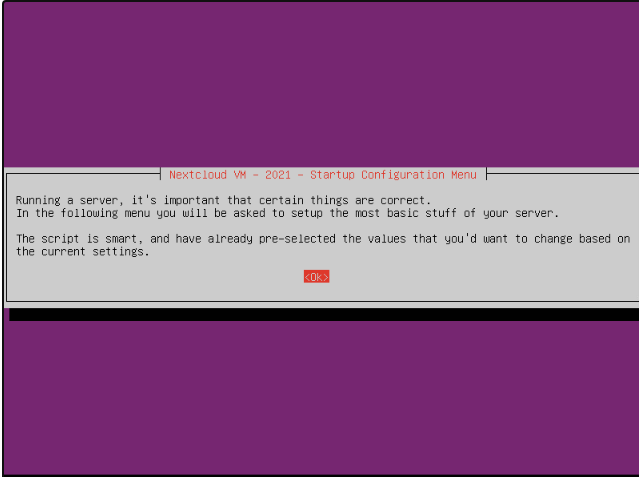

Choose the required settings - timezone, adjust them according to your needs.
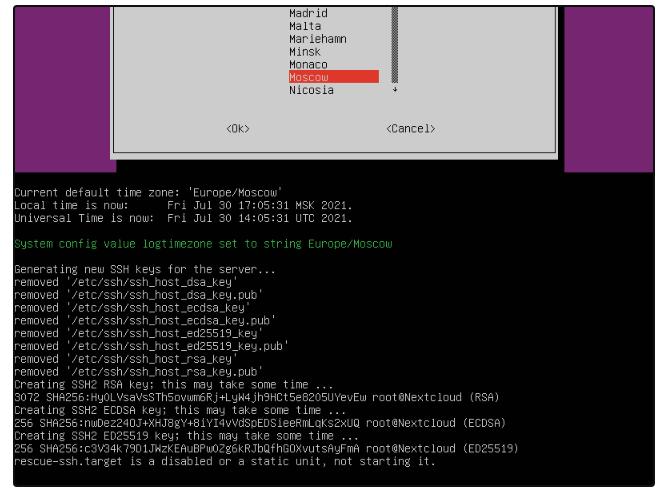
Wait for the end of the preparation phase.
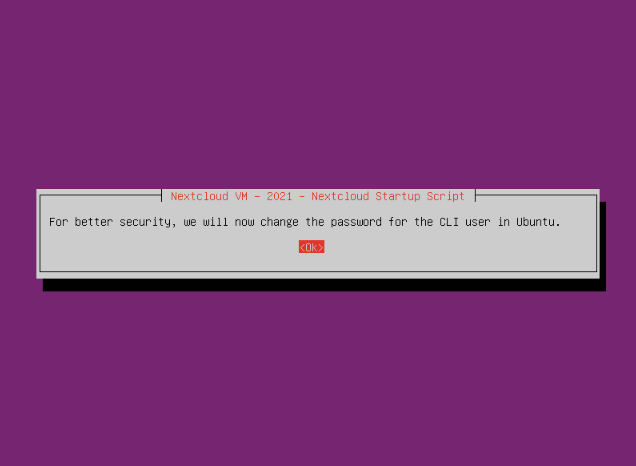
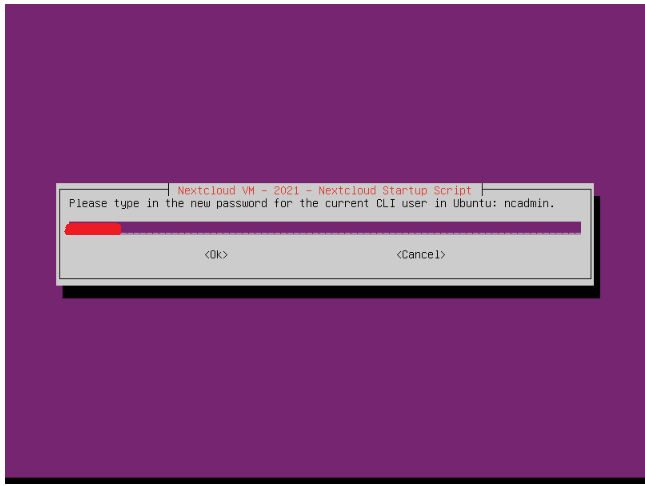
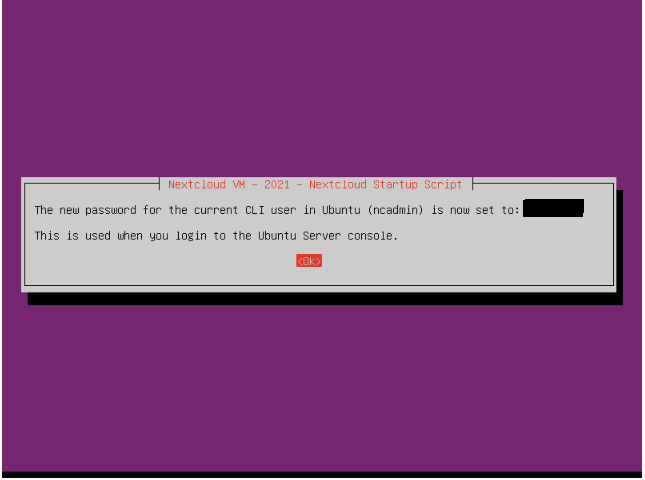
Setting a password for the user ncadmin
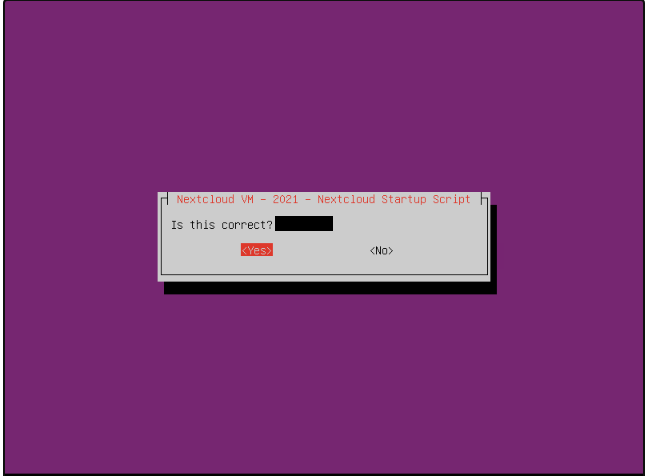
Confirm changing the password from the default password to the one you specified earlier.
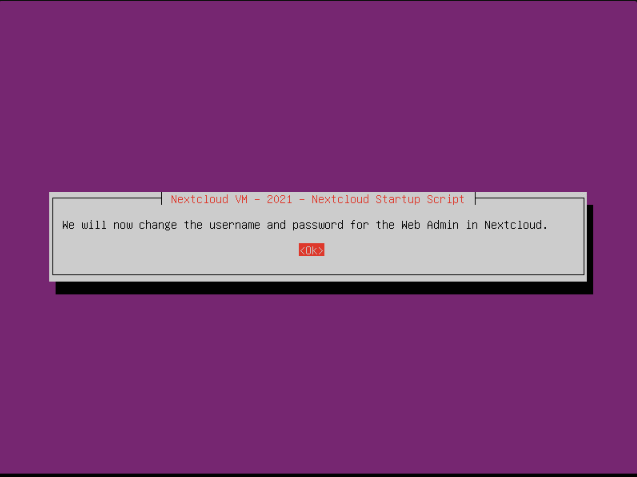
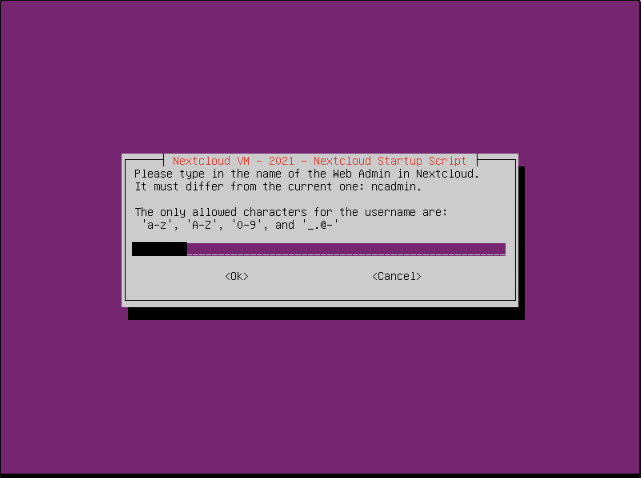
Set a name for the user with administrative rights for nextloud.
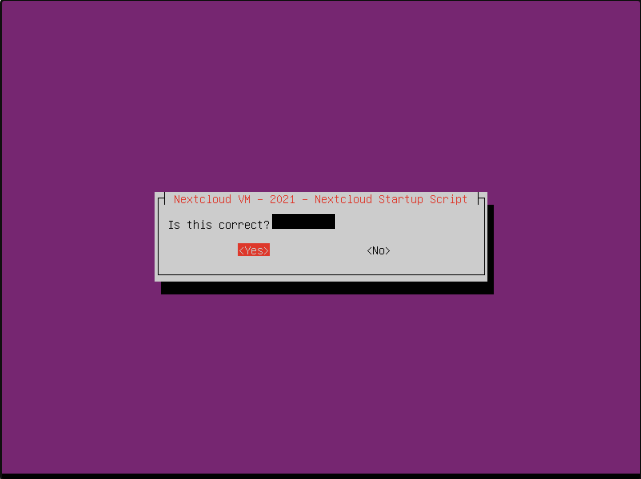
Confirm the user name you set earlier.

Set the password for the previously created user.
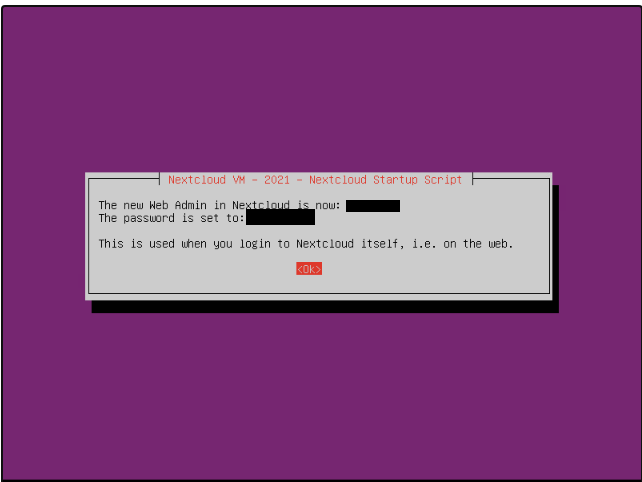
A notification when the credential creation script finishes, which shows the credentials created for accessing the nextcloud web interface.
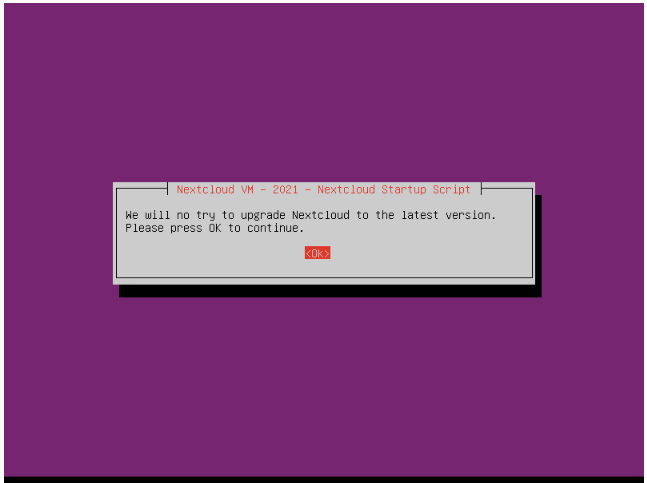
Dialog for upgrading to the latest version of nextcloud.

Waiting for Nextcloud update to complete
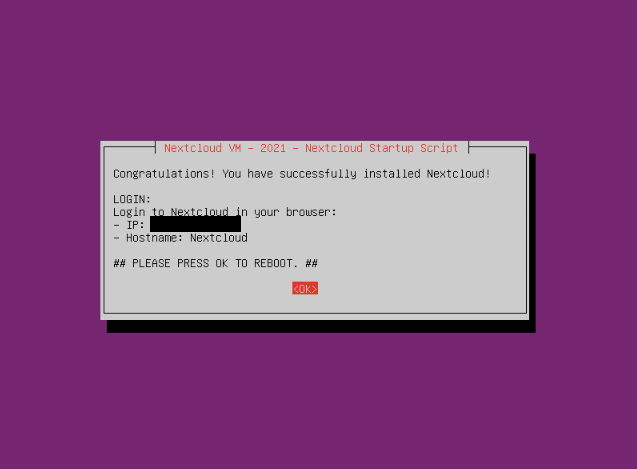
When the update script finishes running and the virtual machine is configured, the internal ip-address (within the vDC network) will be specified and the virtual machine will reboot.
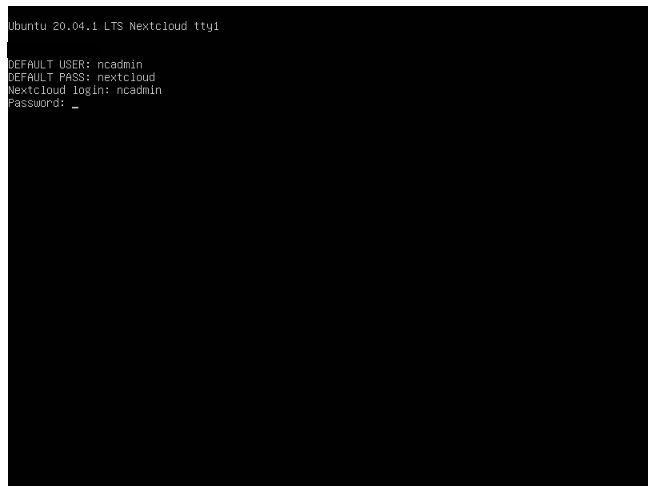
Authorize in the virtual machine after the reboot.
The script specifies external IP, internal IP and hostname, click OK

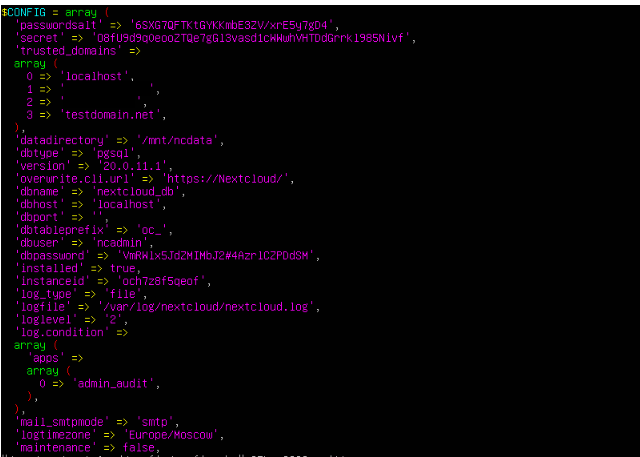
In order to add the external ip address to the list of trusted domains, we need to edit the nextcloud configuration file by running the command:
sudo vi /var/www/nextcloud/config/config.php
Press the "i" button.
Under point 1 is our internal ip-address
Under item 2 we specify our external ip-address
Under item 3, specify the domain name for our nextcloud server (if necessary)
Then press "Ctrl+C" to finish editing the file.
Enter the vim editor command to save and quit edit mode - "wq!"
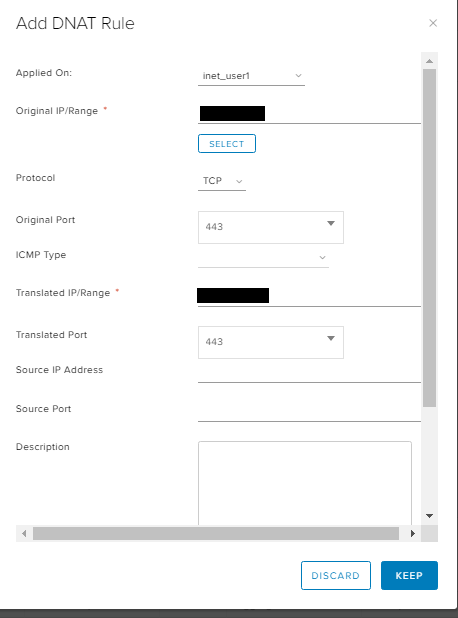
Then go to the Virtual Datacenter Edges-> choose edge-gateway-> services-> nat-> Dnat rule
Specify in the original ip-external ip-address
Original port - 443 or any other required port
Translated ip - specify the ip address of the virtual machine with nextcloud inside the vDC network
Translated port - 443
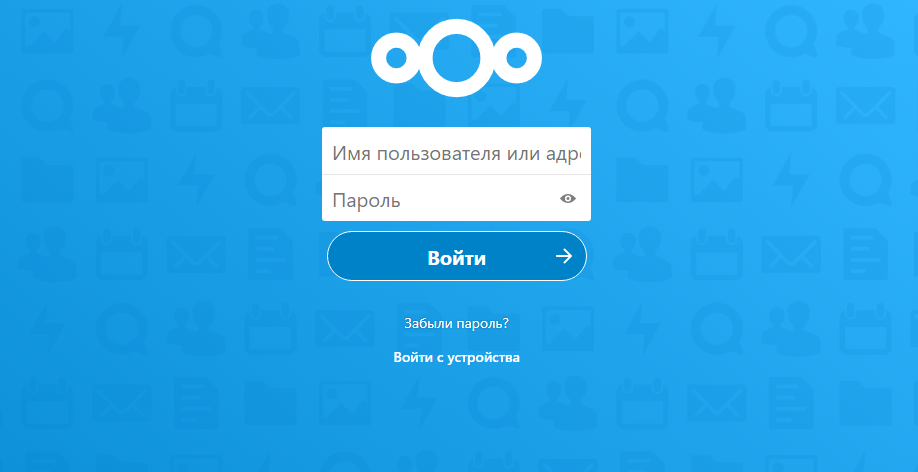
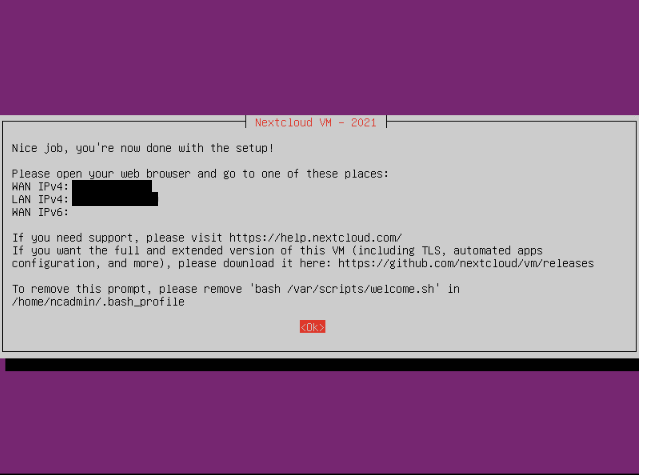
Access the external ip-address through the browser.
Log in with the credentials you specified at the installation stage.
Nextcloud is ready to work.
